Panel Guide
Pyronix Euro 46 V10 – RS232
Panel Connection – Serial RS232
|
Manufacturer |
Pyronix |
|
Model |
Euro |
|
Version |
46 |
|
Minimum DualCom Pro Firmware |
DualCom Pro: V2.24 |
|
Minimum Panel Firmware |
V10 |
|
Cable required? |
Lead Provided with DualCom Pro |
|
Panel Profile |
Pyronix-Euro-RS232 |
|
Panel Bus Connection |
RS232 |
|
Technical Notes |
On completion of programming the Pyronix requires a reboot to establish the electrical connection to the DualCom Pro |
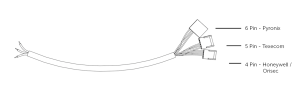
Panel Connection Information
|
Manufacturer |
Panel |
Connection |
Cable/Plug On |
Supplied Cables |
|
Pyronix |
Euro |
RS232 |
6 Pin |
Green – RTN |
Panel Programming
- Enter “Engineer Mode” > Select “Communications” > “Program ARC/SMS”
- Select “ARC Details” > Set “Format” to WebWayOne [141] > Set “SIA Ack Char” [006] > Set “SIA
Nack Char” [021] - “Valid Areas” is Engineer’s choice > “Area Accounts” is Engineer’s choice
- Set “ARC Account” to “Site ID/Account No” > Set “Redials” [003] > Set “Time Out” [30]
- “Test Calls” is Engineer’s choice > “Event Types” is Engineer’s choice
- On completion of programming the Pyronix requires a reboot to establish the electrical connection to the DualCom Pro
Remote Access Programming
- Enter engineer mode and press NO until “SET UP DOWNLOADING?” is displayed, then press YES.
- Go to ‘Set Up Downloading’
- Set “Download by” to (WebWayOne) [4]
- Set “Poll Timeout” [10]
- Set “Modem Init Timeout” [060]
- Set “Rings to Answer” [1]
- Set “Comm Tx Timeout” [030]
- Set “Comm Dial Tmout” [030]
- Set “UDL Tx Timeout” [02]
- Set “Redials” [03]
- Set “Roving Dial” to No [0]
- Set “Auto Upload” to “No” [0]
- “UDL Password” is Engineer’s choice
- “Site Name” is Engineer’s choice
- Go into “Communications Menu” and select “No “until “Advanced Communications”
- Press “Yes” until “ARM PC Tel NO.” and enter 1111