
Accessing the CSL IoT Platform
Don't have an account yet?
Platform Languages
What is an Offline Router Alarm and How Is It Configured?
For customers with a fleet of installed IoT routers, a monitoring feature has been developed to automatically detect when a device loses connectivity. This allows you to configure an alarm that sends an email notification if a router remains unresponsive for a set period of time. This helps reduce downtime, improve network management, and ensure operational continuity.
The CSL IoT Platform periodically checks router status using SNMP calls. If a device does not respond, it is marked as NOK (Not OK), and the date and time of the incident are recorded. Once the configured time has passed, the alarm is triggered and an email is sent notifying the loss of connectivity.
Steps to Configure the Alarm:
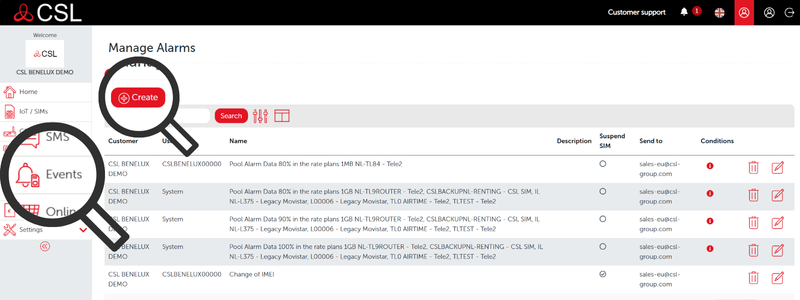
Step 1: Create a New Alarm
Go to the “Events” menu and click the “Create” button to add a new monitoring alarm.
Step 2: Set Alarm Type and Recipients
After clicking “Create,” a pop-up window will appear:
- In the “Type” field, select “Offline Router Alarm.”
- On the right panel, enter the email addresses of the recipients who should receive notifications.

Step 3: Set the Disconnection Time
Use the slider to define the maximum offline period. You can configure the alarm to activate if a router remains offline between 3 and 48 hours, depending on your operational needs.

Step 4: Automatic Assignment Options
- Assign to all existing routers: When you save the alarm, it will automatically apply to all current routers.
- Automatically assign to new routers: Each time a new router is added to the account, the alarm will be automatically applied.
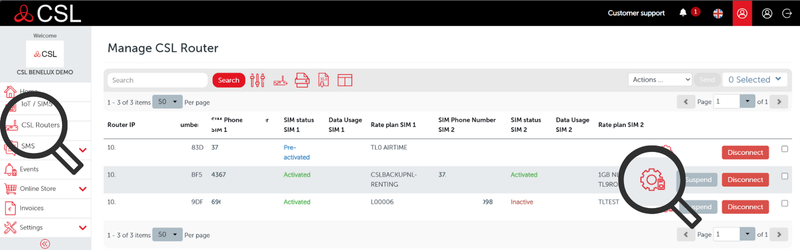
Step 5: Manually Assign the Alarm to Specific Routers
- To manually assign the alarm, leave both assignment checkboxes unchecked.
- Then, go to the side menu and click on “CSL Routers” to manage routers individually.
- Select the desired router and click the gear icon to access its configuration settings.
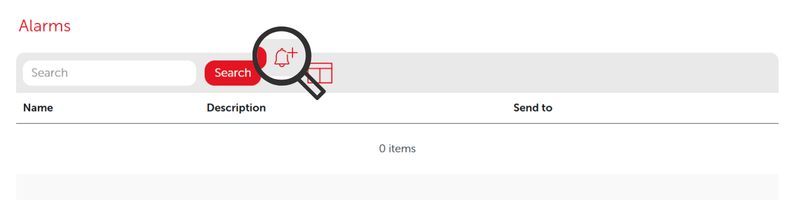
Step 6: Link the Alarm to the Router
Inside the router configuration page, scroll down to the “Alarms” section. Click “Add Alarm” and select the alarm you want to assign.
Step 7: Confirmation
The alarm has now been successfully assigned manually to the selected router.