DSC PowerSeries UDL via CSL Remote Manager
|
Manufacturer’s Software |
DSC DLS 5 v1.74 or higher |
|
Panel Profile |
DSC-PC-RS232 |
|
Technical Notes |
Ensure the panel has been correctly configured according to the DSC PowerSeries panel guide on Installer Zone. In particular note the final step required to enable UDL. |
Setup
- Login to My Base and select the site you wish to connect to.
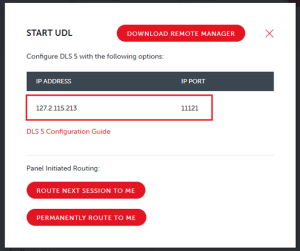
- Click on the “Start UDL’ button and make a note of the IP address and port number.
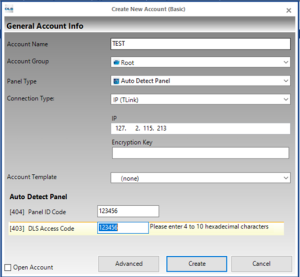
- Open the DSC DLS 5 software and select ‘New Account’:
- Enter the details as below:
- Give the account a name.
- Select ‘Auto Detect Panel’ or, if you know it, the panel model and version.
- Set the ‘Connection Type’ to “IP (TLink)”.
- Enter the IP address as shown in My Base (step 2 above).
- Enter the Panel ID code and DLS Access Code (option 403 and 404 in the panel programming). Note: default for PC 1832 is 183200 for both and for PC1864 is 186400 for both fields.
- Select ‘Create’.
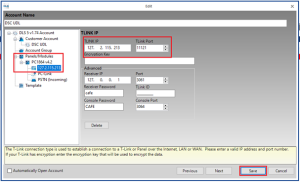
- The account will appear in the list on the main page of the DLS 5 software. Right click on the entry and select ‘Properties’.
- Under Panels/Modules you will see the panel that was just added (example highlighted).
- Enter the Port Number provided on the My Base screen (see step 2 above) in the TLink Port box
- Click Save
- Open the newly created account by double clicking on its name in the main window:
- Select the ‘Global Upload’ icon
 to read the current panel setup.
 - Make any necessary changes.
- Select the ‘Global Download’ icon
 to send the data back to the panel. It will disconnect from the panel when complete.
 - Note: ‘Connect Only’ is not supported.

- Select the ‘Global Upload’ icon