
Quick Guide
Teltonika Networks
AnyConnect
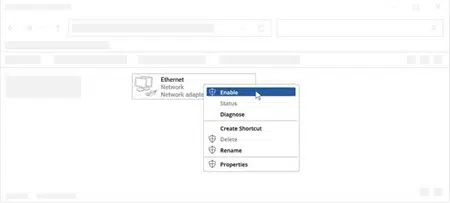
Configure Your Computer LAN (Windows)
1. Ensure the Network connection is Enabled. Go to Start — Control Panel — Network and Internet — Network and Sharing Center. Click on the Change adapter settings in the left panel, then right-click on Network Adapter, and select Enable.
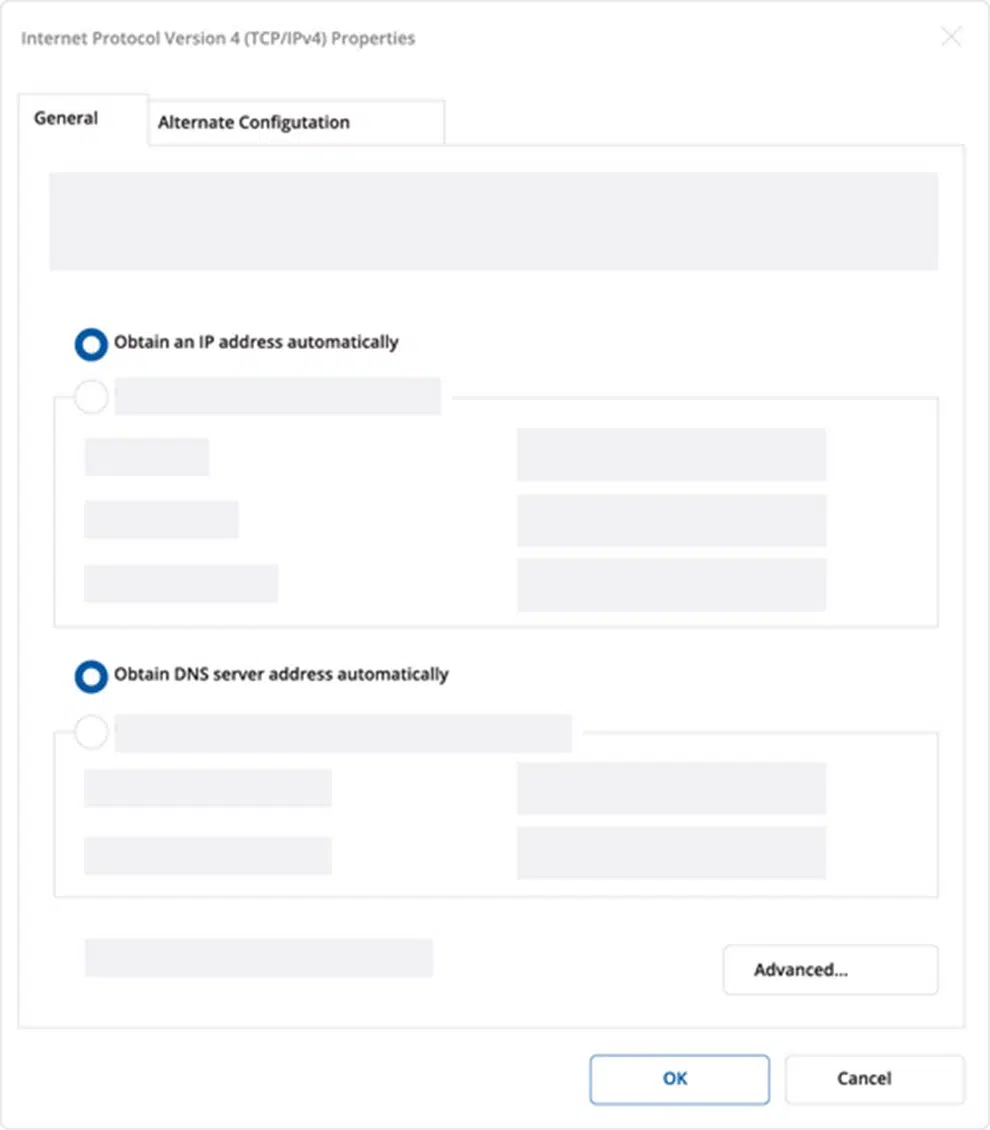
2. Check if IP and DNS are obtained automatically. Right-click on Wireless Network Adapter and select Properties. Then select Internet Protocol Version 4 and click Properties.
3. If not selected, check to obtain an IP address and obtain DNS server address automatically. Click OK.
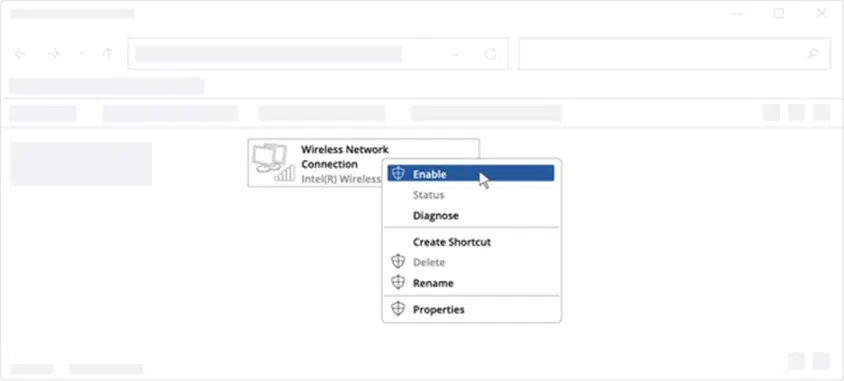
Configure your computer Wi-Fi (Windows)
1. Ensure the Wireless network connection is Enabled. Go to Start — Control Panel — Network and Internet — Network and Sharing Centre. Click on the Change adapter settings in the left panel, then right-click on Wireless Network Adapter, and select Enable.
2. Check if IP and DNS are obtained automatically. Right-click on Wireless Network Adapter and select Properties. Then select Internet Protocol Version 4 and click Properties.
3. If not selected, check to obtain an IP address and obtain DNS server address automatically. Click OK.

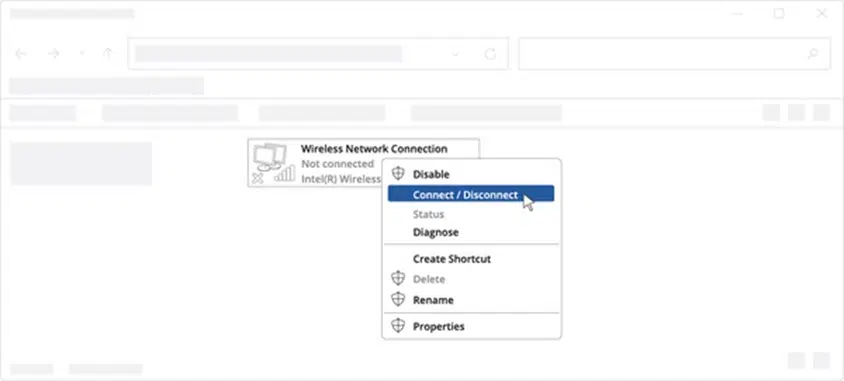
4. Connect to a wireless network by right-clicking on Wireless Network Adapter and selecting Connect.
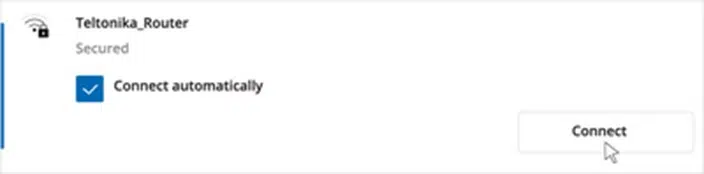
5. Choose the wireless network RUT200 **** from the list and click Connect. Enter the Wi-Fi password located on the device’s label.
Login to Device
1. To enter the router’s Web interface (WebUI), type http://192.168.1.1 into the URL field of your Internet browser.
2. When prompted for authentication enter the username admin and enter the password located on the device information label/engraving.

3. After logging in, you must set a new password for security reasons. You will not be able to interact with the router’s WebUI until the default password is changed. The new password must consist of a minimum of 8 characters. Requirements: one uppercase letter, one lowercase letter, and one digit.
4. Next, the Configuration Wizard will start to help you set up some of the router’s main operational parameters.
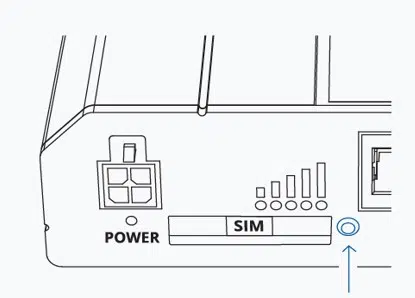
5. Finally, let’s verify the Mobile signal strength. Go to the Status — Network page and pay attention to the Signal Strength indication.
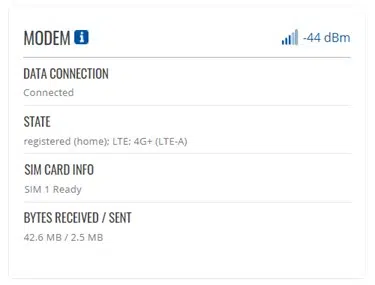
To achieve the best signal conditions and maximize cellular performance, try adjusting the antennas or changing the location of your device.
Technical Specifications
| Mobile module | 4G (LTE) – Cat 4 up to 150 Mbps, 3G – Up to 42 Mbps, 2G – Up to 236.8 kbps |
| Wireless mode | IEEE 802.11b/g/n, Access Point (AP), Station (STA) |
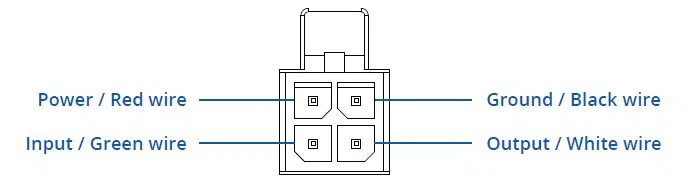
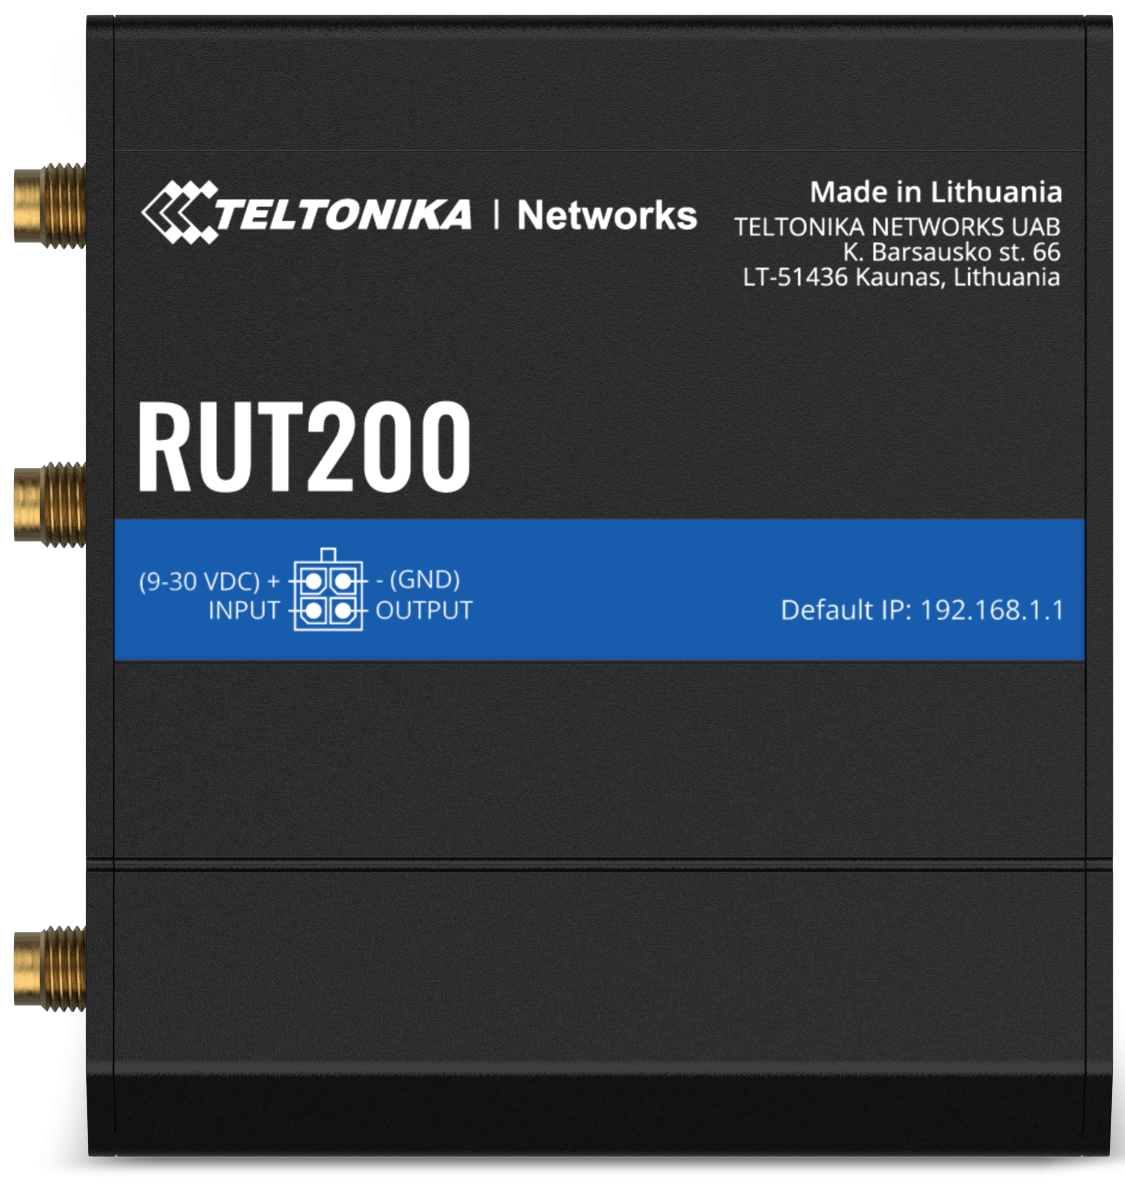
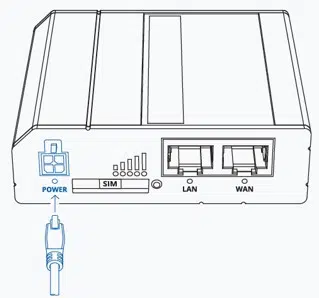
| Power Connector | 4-pin industrial DC power socket |
| Input voltage range | 9 – 30 VDC, reverse polarity protection; surge protection >31 VDC 10us max |
| Ethernet | 2 x RJ45 ports, 10/100 Mbps |
| I/O’s | 1 x Digital Input, 1 x Digital Output on 4-pin power connector |
| Status LEDs | 3 x Connection type status LEDs, 5 x Connection strength LEDs, 2 x LAN status LEDs, 1 x Power LED |
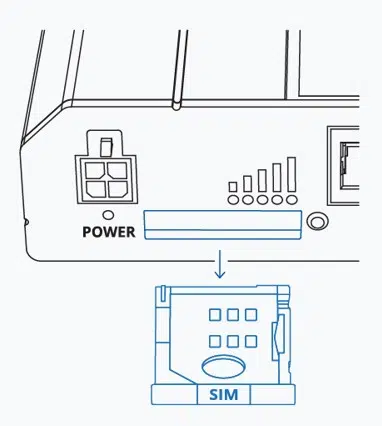
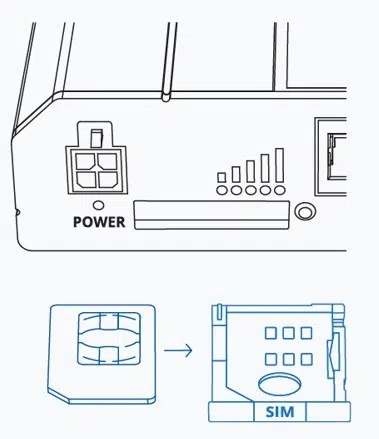
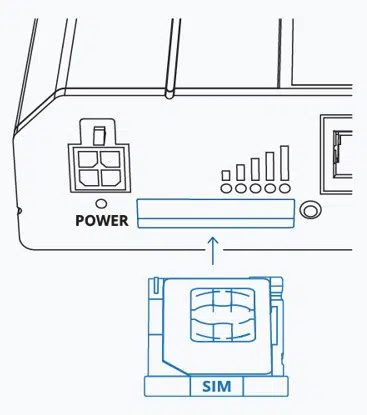
| SIM | 1 x SIM slot (Mini SIM – 2FF), 1.8 V/3 V, external SIM holder |
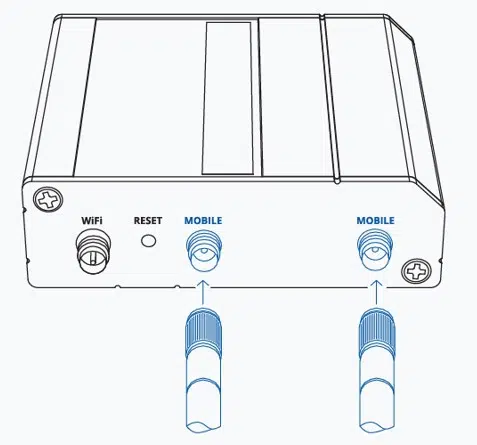
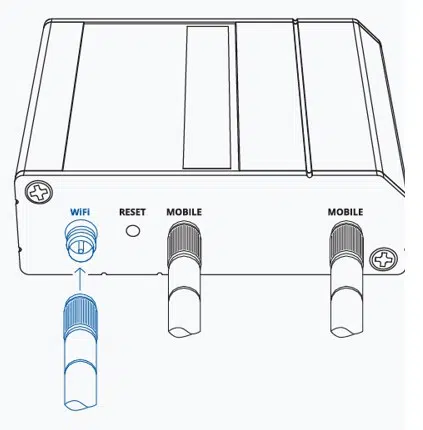
| Antennas | 2 x SMA for LTE, 1 x RP-SMA for Wi-Fi antenna connectors |
| Dimensions (W x H x D) | 83 x 25 x 74 mm |
| Weight | 125g |
| Mounting options | Bottom and sideways DIN rail mounting slots |
| Operating temperature | -40 °C to 75 °C |
| Ingress Protection Rating | IP30 |
| Standards | IEC 62368-1:2018 (CB Scheme) |
Front View

Rear View

Power Socket Pinout