DSC PowerSeries UDL via CSL Remote Manager
| Manufacturer’s Software | DSC DLS 5 v1.74 or higher |
| Panel Profile | DSC-PC-RS232 |
| Technical Notes | Ensure the panel has been correctly configured according to the DSC PowerSeries panel guide on Installer Zone. In particular note the final step required to enable UDL |
Setup
1. Login to My Base and select the site you wish to connect to
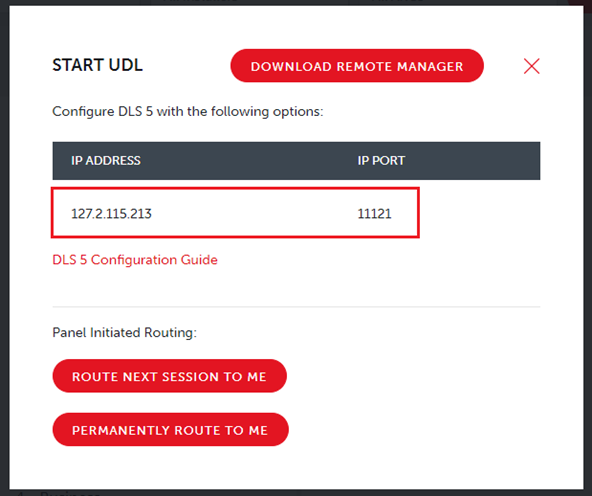
2. Click on the “Start UDL’ button and make a note of the IP address and port number

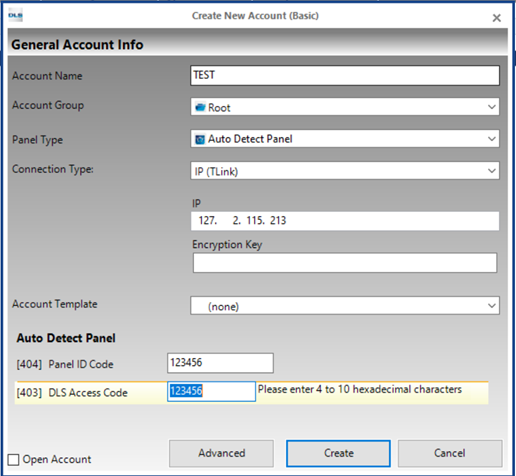
3. Open the DSC DLS 5 software and select ‘New Account’
4. Enter the details as below
a. Give the account a name
b. Select ‘Auto Detect Panel’ or, if you know it, the panel model and version
c. Set the ‘Connection Type’ to “IP (TLink)”
d. Enter the IP address as shown in My Base (step 2 above)
e. Enter the Panel ID code and DLS Access Code (option 403 and 404 in the panel programming)
Note: default for PC 1832 is 183200 for both and for PC1864 is 186400 for both fields
f. Select ‘Create’

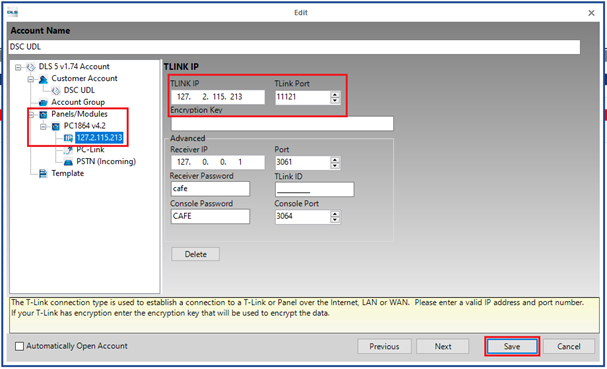
5. The account will appear in the list on the main page of the DLS 5 software. Right click on the entry and select ‘Properties’
a. Under Panels/Modules you will see the panel that was just added (example highlighted)
b. Enter the Port Number provided on the My Base screen (see step 2 above) in the TLink Port box
c. Click Save

6. Open the newly created account by double clicking on its name in the main window
a. Select the ‘Global Upload’ icon ![]() to read the current panel setup.
to read the current panel setup.
b. Make any necessary changes
c. Select the ‘Global Download’ icon ![]() to send the data back to the panel. It will disconnect from the panel when complete.
to send the data back to the panel. It will disconnect from the panel when complete.
Note: ‘Connect Only’ ![]() is not supported.
is not supported.
