CSL Satellite
We provide resilient, encrypted Critical Connectivity by utilising a low Earth orbit (LEO) Satellite constellation and delivering enterprise-grade broadband where mobile and fixed options are unavailable or unreliable.
Encryption – Delivers military-grade end-to-end encryption to safeguard your data.
Low-Cost Remote Coverage – Provides low-cost, always-on connectivity in locations where mobile and fixed options are costly, unreliable, or unavailable
Low Earth Orbit – Low Earth orbit (LEO) satellites provide low latency and high throughput compared to other technologies.
Prioritised Service – Get the critical bandwidth you need when it matters most. CSL prioritises your data over standard connections.
Fast Deployment – Lightweight, plug-and-play terminals get you online quickly and easily. No complex installations or long wait times.


Quick Guide
Step 1. Download the App
Download and install the Starlink app on your phone. The Starlink app is available on both Android and iOS devices. The app is a critical part of the initial setup. You’ll also use the app to configure various settings and troubleshoot any issues after you get your Starlink up and running. Search for Starlink in your app store.
Step 2. Site Suitability
For the satellite terminal to operate it will require power and an unobstructed view of the sky. Your Starlink needs a clear view of the sky so it can stay connected with satellites as they move overhead. Objects that obstruct the connection between your Starlink and the satellite, such as a tree branch, pole, or roof, can cause service interruptions.
If you cannot find a clear field of view from the ground level, consider installing it in an elevated location, like a roof, pole, or wall. Additional mounts and accessories are available for purchase via CSL.


Step 3. Installation
Ready to connect
Standard data users: ensure you are at the registered address. The terminal will only work when located at its registered address.
Global Mobility data users: Activate your terminal anywhere. Subject to Starlinks coverage availability.
Call us at +44 (0) 1895 474 474 (opt 7) to let us know your installation is about to begin.
Request for your account to be activated, this activates your airtime, usually within 15 minutes (but can take up to an hour).
You will need to quote the KIT or A number of your terminal; this is found on a sticker on the back of your Starlink dish.
Cabling
- Lift the kickstand and plug one end of the provided cables into your Starlink with the cable locking feature facing up.
- Ensure the plug is fully inserted so the plug face is flush with the surface.
- Route the other end of the Starlink cable to your Router and plug it into port number 1 indicated with the antenna symbol on the back of the router.
- Plug the Gen 3 Router into a power outlet using the power cable and power supply.

Step 4. Connect, Align, and Manage
- Open the Wi-Fi settings on your phone. You should see a new wireless network called STARLINK, STINKY, or DISHY. Connect to it to proceed.
- Open the Starlink app. The app will prompt you to set up the Wi-Fi by adding an SSID and password of your choice. Keep a record of this as this password is not stored by CSL.
- Once you have set up an SSID and password. You just need to connect to the network you just set up and add the password. You are now connected.
- Once connected, an alert on the App will show if you need to rotate Starlink to be properly aligned. Click the alert to use the alignment tool.
- If prompted by the app, ensure any updates are applied.
Note: there is some functionality in the app that requires the user to be logged in to an account. This account is managed by CSL on your behalf so please contact us if you need any of this functionality activated.

Step 5. Troubleshooting
Unable to connect:
1. Ensure there is a clear line of sight to the sky with no obstructions.
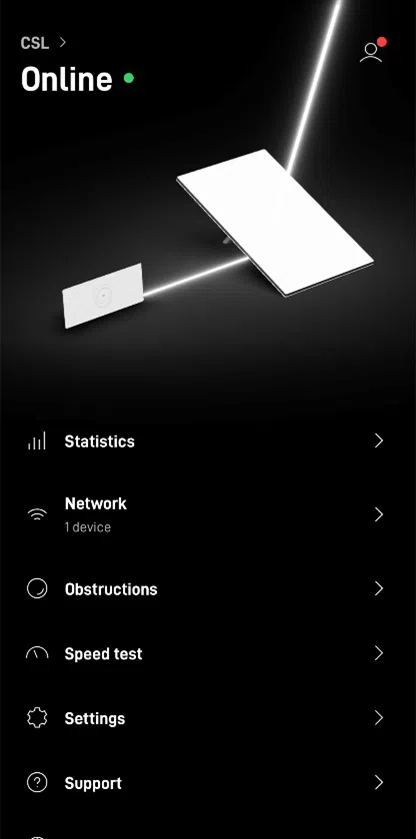
2. Open the Starlink App to check for any alerts, outages, or obstructions. Follow the prompts in the app to resolve these.
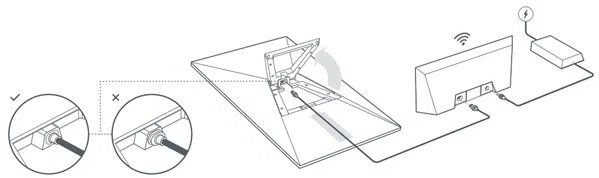
3. Check the Wi-Fi router light.
Router Light Table | |
Flashing White | Trying to connect. The light will turn solid white when setup is complete and the router is connected to the internet, or solid red if the router cannot get a connection to the internet in 20 minutes. |
Solid White | Connected to internet. Will turn off after 1 hour |
No Light | No power to router. With good connection, the light will turn off after 1 hour. |
Red Light | Not connected to the internet. |
Violet Light | Router is in bypass mode. Will turn off after 1 hour. Factory reset required to exit bypass mode. |
4. Make sure everything is securely plugged in and there is no damage to hardware or cables.
5. Power cycle Starlink by unplugging from the power and then plugging back in.
6. Factory reset the router by pushing the reset button between the two ethernet ports.
7. Confirm you are at the correct service address listed on your account if using fixed airtime.
8. If none of these works, contact CSL Customer Support.
Step 6. Wi-Fi Bypass (Optional)
If you require the Wi-Fi router to be hidden and unsearchable you have two options.
- Hidden network – the Wi-Fi will still work for connected devices but will not be visible/searchable.
- Wi-Fi Bypass – The Wi-Fi router is completely bypassed and only Ethernet connections will be enabled.
Simply give us a call at +44 (0) 1895 474 474 opt 7, and let us know which of the above you would like applied.
Note. The hidden network option is reversible by simply calling into or helpdesk. The Wi-Fi bypass option will require a reset of the unit to reverse but this does involve reconfiguring the SSID and password for the router.
Technical Specifications
Standard (V4) Terminal
For Static use-cases
Antenna | Electronic Phased Array |
Field of View | 110° |
Orientation | Software Assisted Manual Orienting |
Dish Weight | 2.9 kg (6.4 lb) 3.2 kg (7 lb) with Kickstand 3.8 kg (8.3 lb) with Kickstand & 15 m Cable |
Environmental Rating | IP67 |
Operating Temperature | -30°C to 50°C |
Wind Speed | Operational: 50 mph+ |
Power Consumption | Average: 75-100 W |
LAN | RJ45 |
Wifi provided by Starlink router included with purchase of the V4 Terminal.
Wifi is optional and can be bypassed.
Wi-Fi | 802.11 a/b/g/n/ac/ax |
Generation | Wi-Fi 6 |
Radio | Tri Band 4 x 4 MU-MIMO |
Operating Temperature | -30°C to 50°C |
Weight | 0.57 kg (1.25 lbs) |
Security | WPA2 |
Environmental Rating | IP56 (Indoor use) |
Flat High-performance (FHP) Terminal
For mobile use cases
Antenna | Electronic Phased Array |
Field of View | 140° |
Orientation | Fixed |
Dish Weight | 5.9 kg / 13 lbs without Cable 8.1 kg / 17.9 lbs with 25 m / 82 ft Cable |
Environmental Rating | IP56 |
Operating Temperature | -30°C to 50°C |
Wind Speed | Survivable: 174 mph+ |
Power Consumption | Average: 110-150 W |
LAN | RJ45 |
Wifi router is a paid extra and not included as standard with the FHP terminal.
Wi-Fi | 802.11ac Dual Band |
Generation | Wi-Fi 5 |
Radio | Dual Band -3 x 3 MIMO |
Operating Temperature | -30°C to 50°C |
Weight | 1kg |
Security | WPA2 |
Environmental Rating | IP54 |
Dimensions
Standard Terminal


High Performance Terminal


FAQs
I’ve plugged everything in as it says in the Quick Guide but it doesn’t seem to be working, what have I missed?
In order to get your CSL Satellite service online, you will need to call the CSL Support team to activate your Airtime bundle.
Please call +44 (0) 1985 474 474 opt 7, with your KIT number to hand. The KIT number should be located on the sticker at the back of the Terminal.
Where should I install my CSL Satellite Dish for the best Signal Strength?
The dish requires an unobstructed view of the sky to maintain a strong connection. Avoid placing it near trees, buildings, poles, or other structures that could block or reflect the signal.
Installing the dish on a rooftop, pole, or elevated platform improves signal reception by reducing ground-level obstructions. You can purchase additional mounts and accessories by contacting your account manager.
How do I hide my CSL Satellite connection?
Please see our Quick Guide on how to ensure your Wi-Fi router will be hidden and unsearchable.
You will need to contact our Support team at +44 (0) 1985 474 474 opt 7 to complete this action. It is also possible to reverse the hidden network option by contacting the Support Team.
Can I pause or cancel my Airtime?
Please contact our Support Team at +44 (0) 1985 474 474 opt 7 if you wish to cancel or pause your Airtime. You will need your KIT number to hand.
My CSL Satellite connection keeps dropping-what should I do?
Ensure a stable power supply; use a surge protector if possible.
Check all Ethernet and power connections for a secure fit.
Reassess the installation location and move objects blocking the dish’s view, or mount the dish in a more optimal position with a clear view of the sky.
Check the Starlink App for any alerts, outages or obstructions.
If connection issues continue, contact our Support Team at +44 (0) 1985 474 474 opt 7.
What does a solid blue LED mean?
Do not unplug or restart the system. Wait for the update to complete (this may take up to 15 minutes).
If the LED remains blue for an extended period, restart the router and modem.